





Your shopping cart is currently empty...
How Vericom's Cable Ladder Rack System Works
Published: July 15, 2026
Let’s Walk Through It
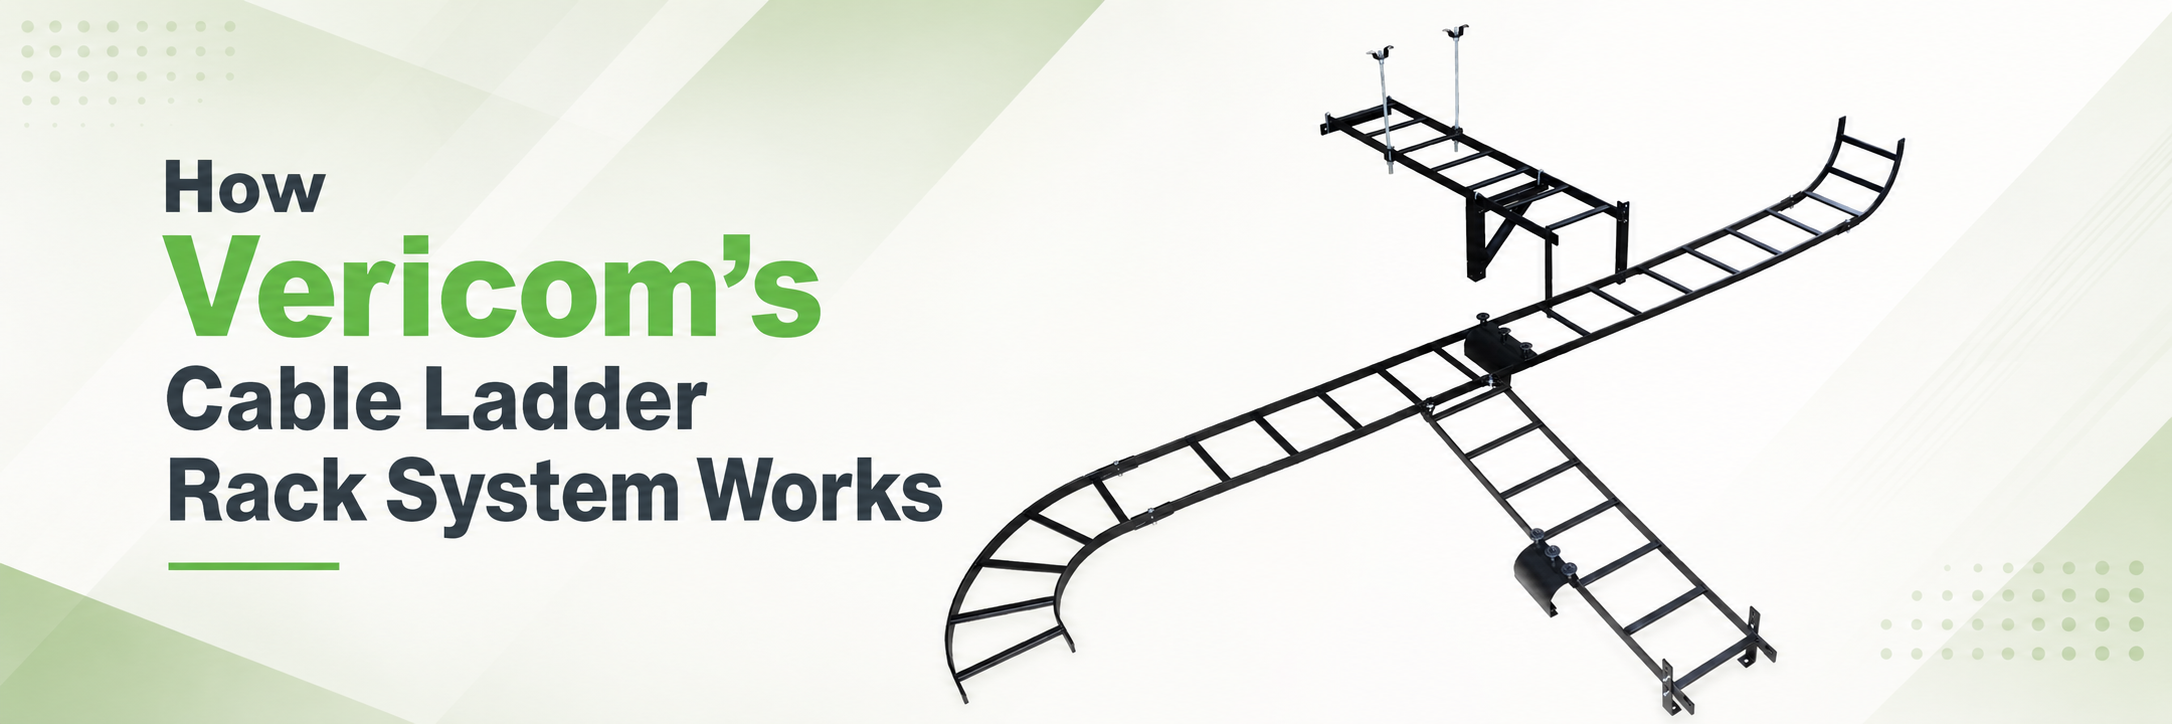
The simplest way to picture ladder rack is as an overhead road for communication cables.
The ladder creates the main route. Brackets support it, elbows turn it, splice kits connect it, and radius drops guide cables toward the equipment below. Each piece has a job, but they are all designed to work together.
Picture this: You have a row of racks, another cabinet across
the room, and several cable bundles that need a clean path between them.
Here’s how you build it.
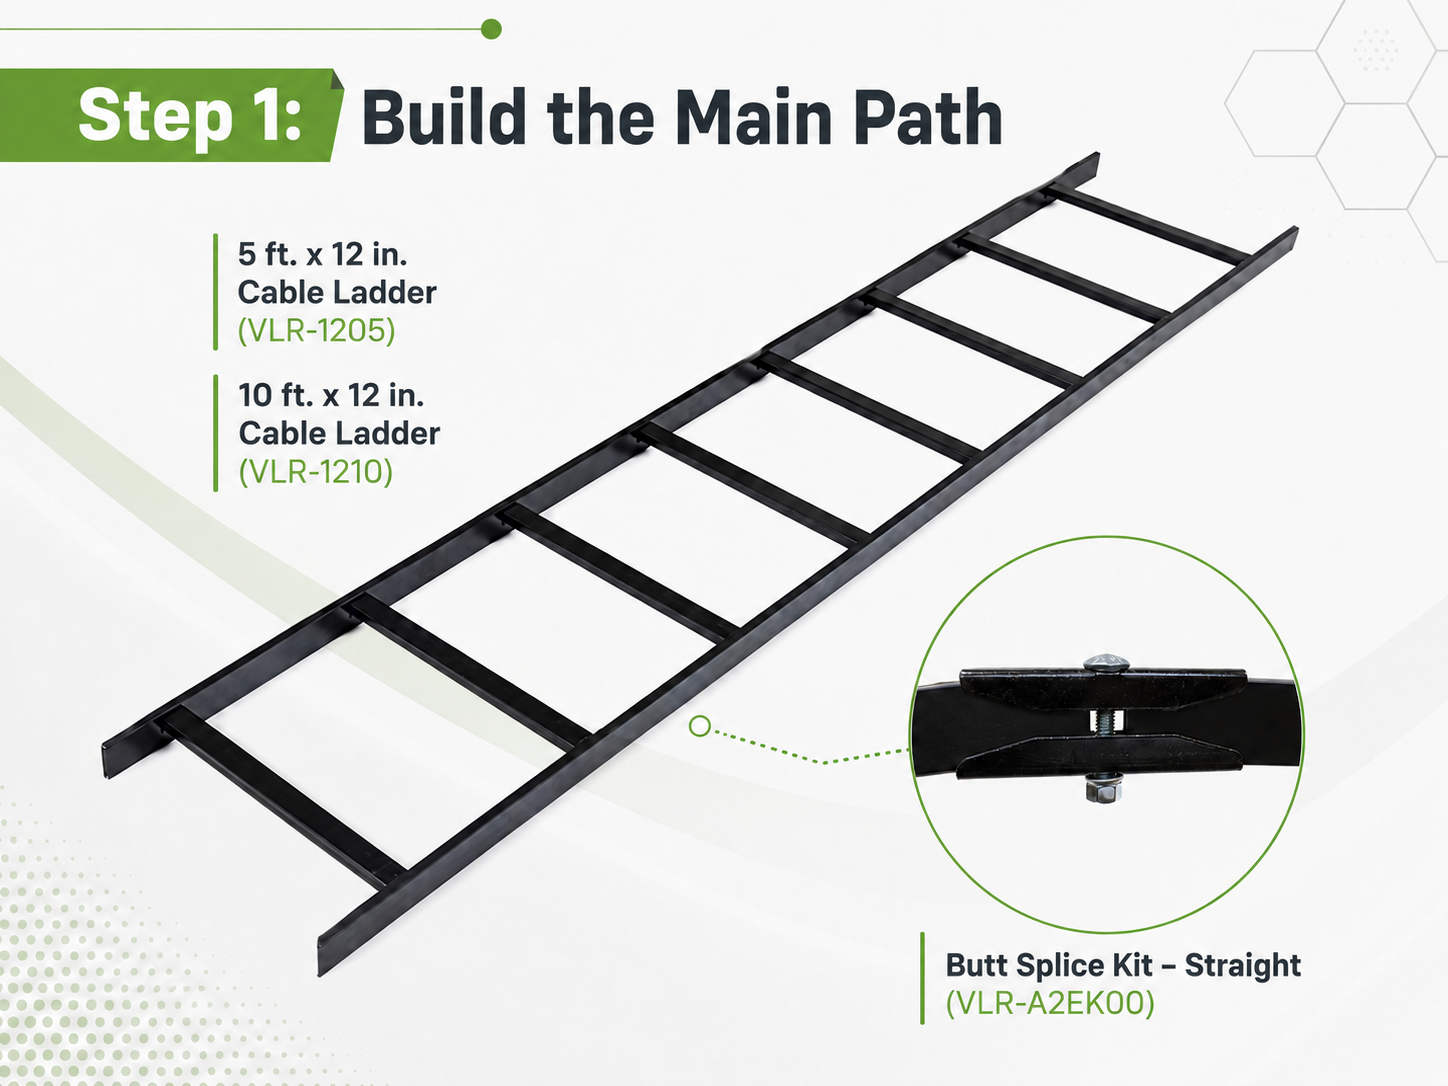
Step 1: Build the Main PathStart with either the 5 ft. x 12 in. Cable Ladder (VLR-1205) or the 10 ft. x 12 in. Cable Ladder (VLR-1210). These ladder sections create the main runway that carries the cable bundles overhead. Need a longer run? The Butt Splice Kit – Straight (VLR-A2EK00) joins ladder sections end to end, making it easy to extend the pathway as needed. Mix and match 5-foot and 10-foot sections, connect them, and keep building until the pathway reaches the next rack, cabinet, or equipment row. |
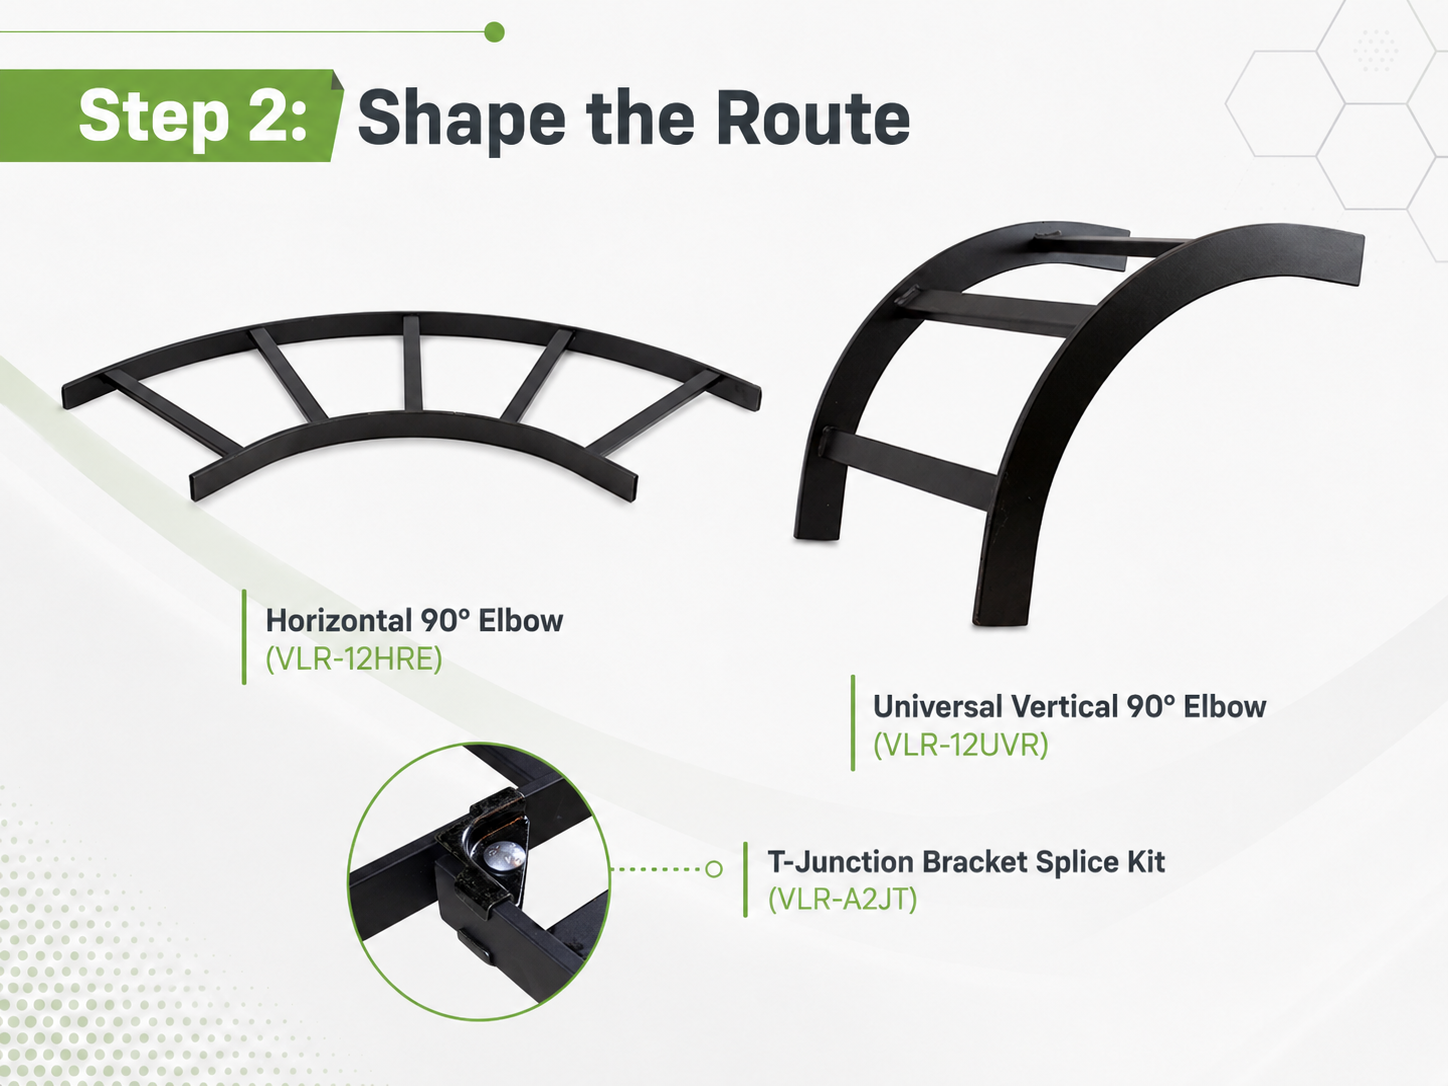
Step 2: Shape the RouteMost equipment rooms require a few turns along the way. The Horizontal 90° Elbow (VLR-12HRE) turns the runway around a corner while keeping it at the same height. The Universal Vertical 90° Elbow (VLR-12UVR) changes the pathway from horizontal to vertical, or the other way around. Need a second route to branch off? The T-Junction Bracket Splice Kit (VLR-A2JT) connects two ladder runs at a 90-degree angle. That means one main pathway can turn across the room and branch toward several equipment areas. |
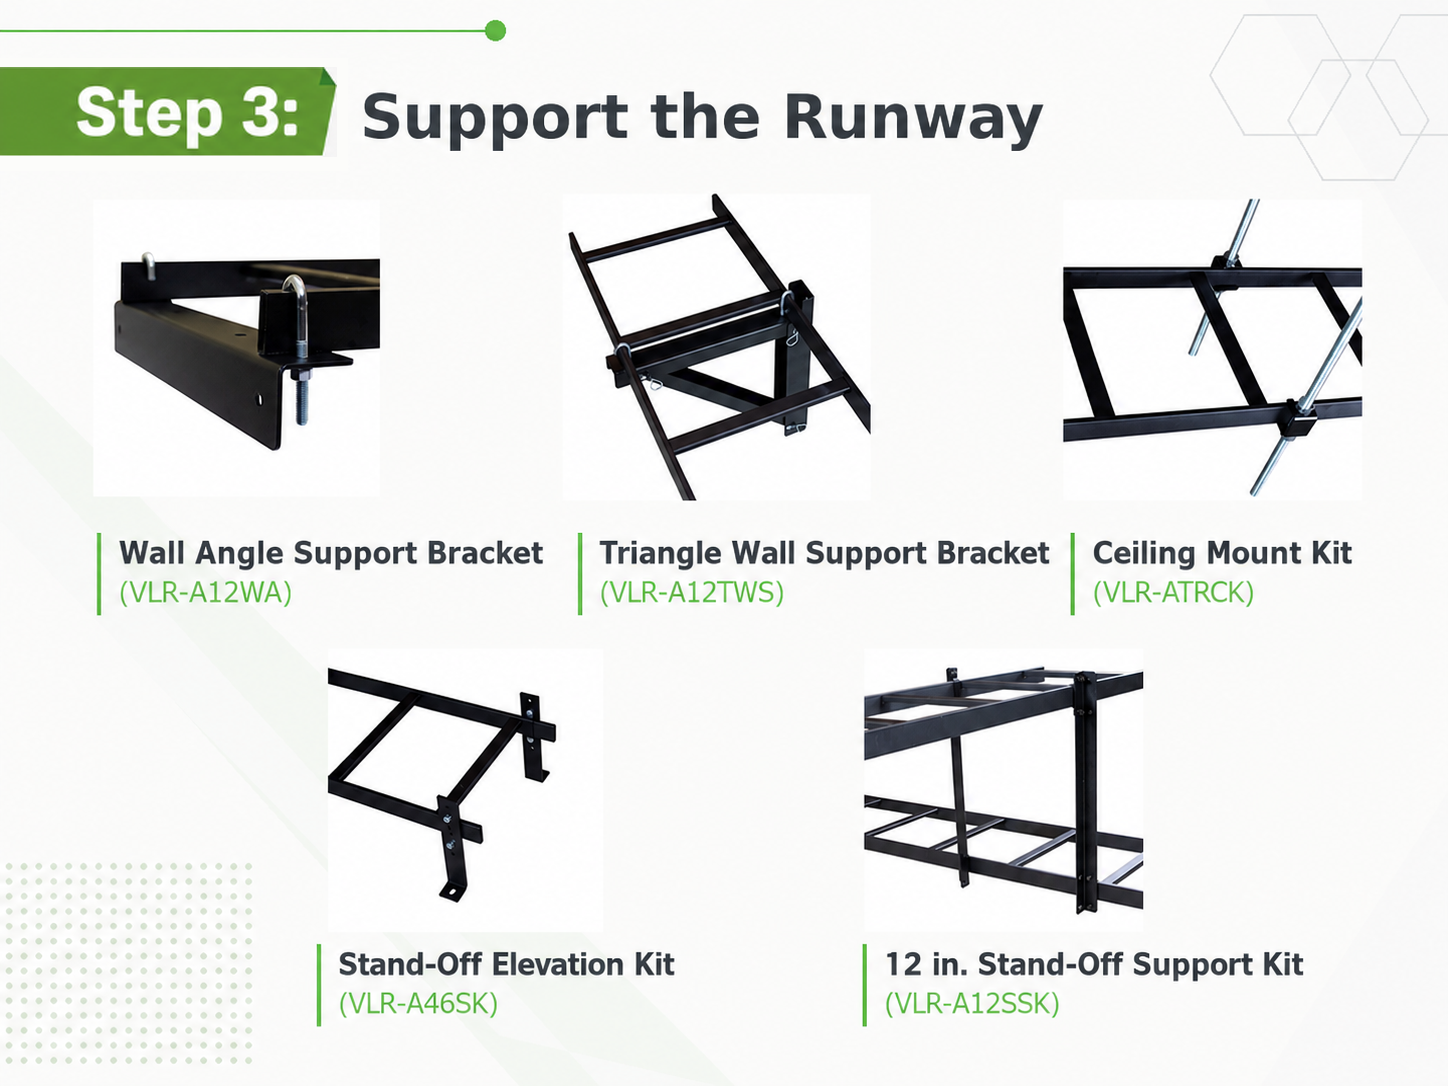
Step 3: Support the RunwayOnce the route is planned, choose the support hardware that fits the room. The Wall Angle Support Bracket (VLR-A12WA) supports the end of a ladder run at a wall. If the ladder travels alongside the wall, use the Triangle Wall Support Bracket (VLR-A12TWS). Crossing an open area? The Ceiling Mount Kit (VLR-ATRCK) suspends the runway from above. The Stand-Off Elevation Kit (VLR-A46SK) supports a ladder run above a cabinet or rack. The 12 in. Stand-Off Support Kit (VLR-A12SSK) creates a second pathway above an existing ladder run. In other words, the system can be supported from the wall, ceiling, equipment, or even another cable pathway. |
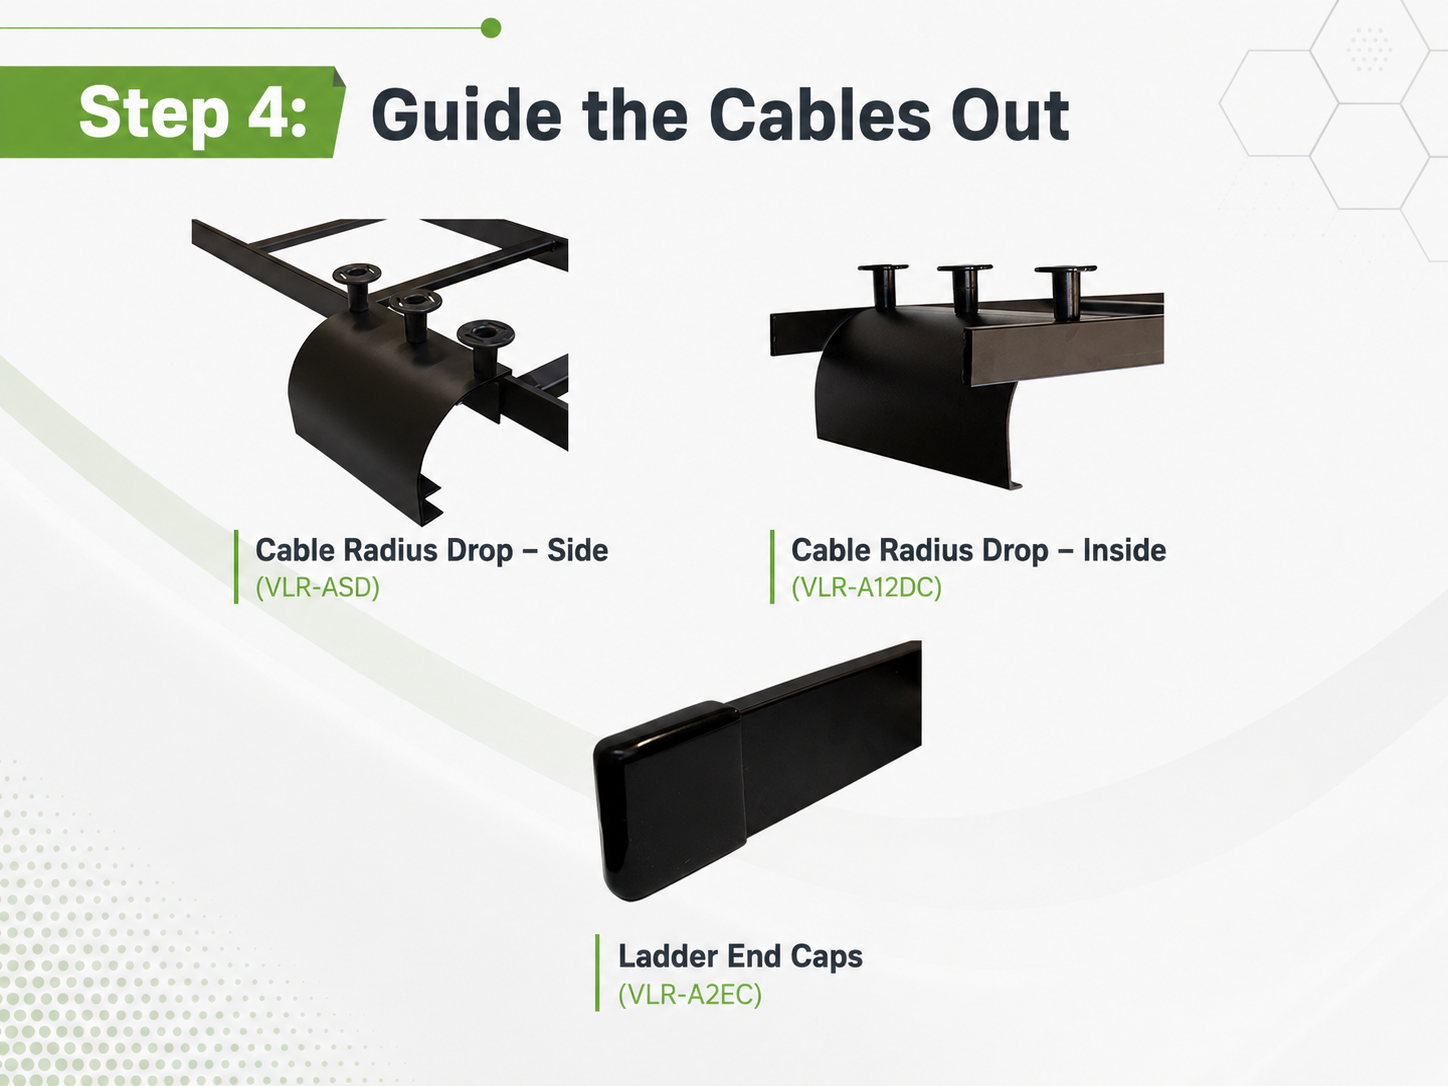
Step 4: Guide the Cables OutOnce the cables reach their destination, they need a smooth way to leave the runway. The Cable Radius Drop – Side (VLR-ASD) guides cables over the side of the ladder. The Cable Radius Drop – Inside (VLR-A12DC) lets them exit from within the pathway. Both provide a rounded surface so cables do not have to bend across a hard edge. At the end of the runway, Ladder End Caps (VLR-A2EC) cover exposed edges and help protect cables and technicians. |
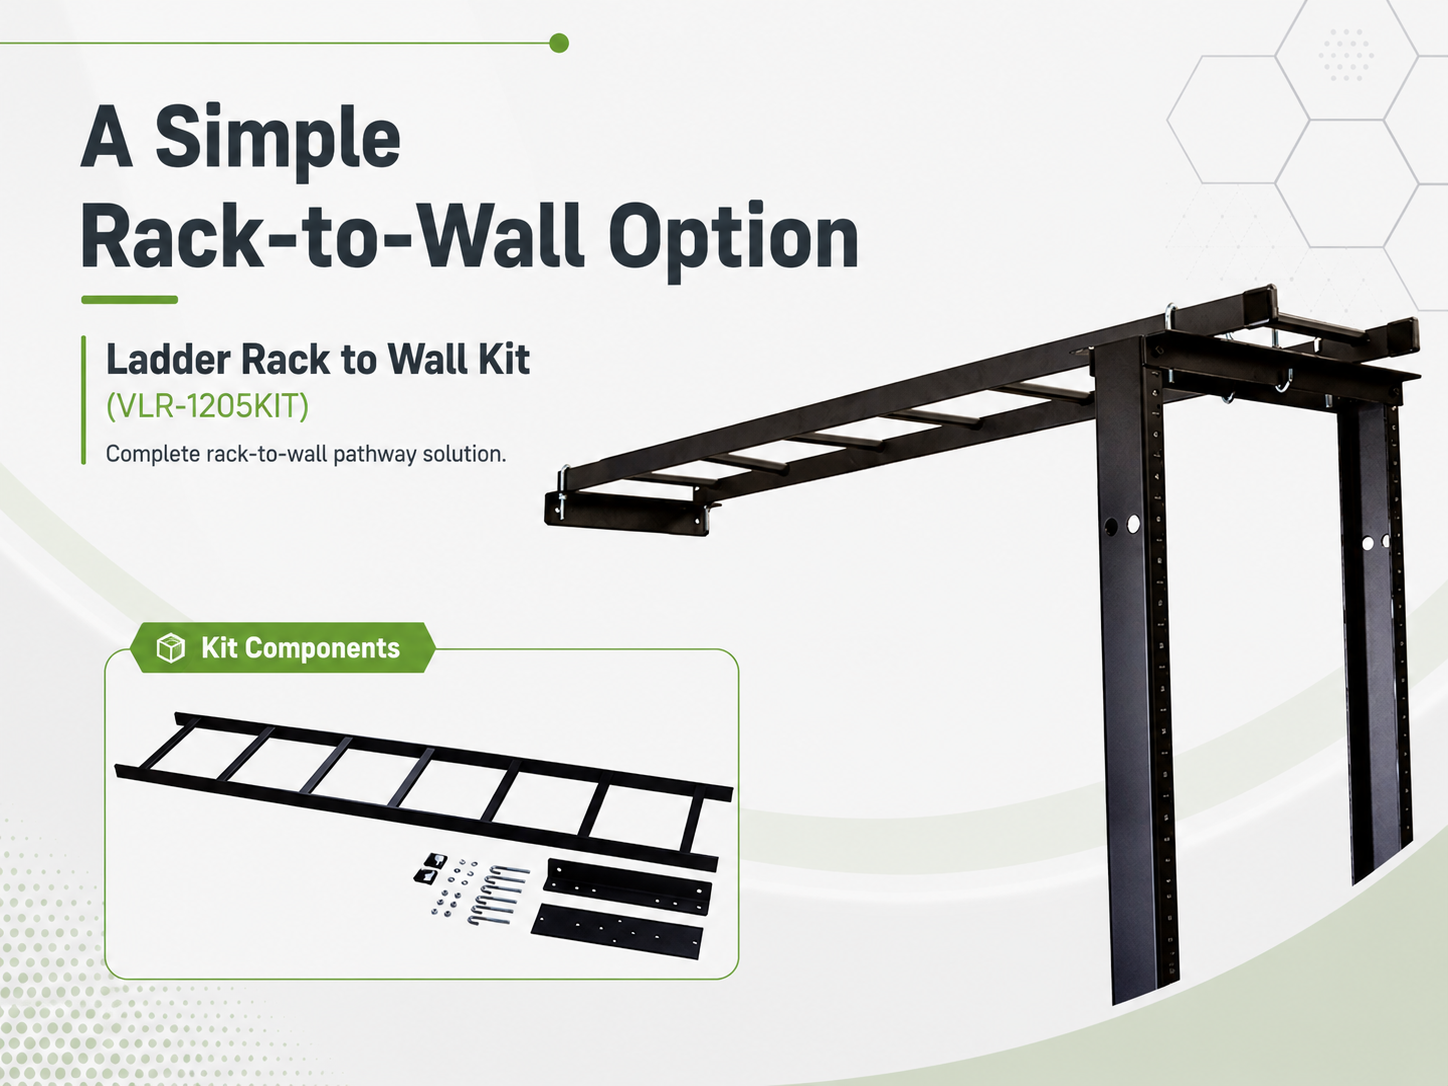
A Simple Rack-to-Wall OptionNot every project needs a pathway across the entire room. For a straightforward connection between a two-post rack and a wall, the Ladder Rack To Wall Kit puts the main components under one easy-to-order item number. The kit includes:
It is compatible with most two-post racks with 3-inch-wide posts. Instead of ordering each piece separately, you get the core parts needed for one of the most common ladder rack setups. |
A few helpful details:
The VLR Series features welded tubular steel construction and a black powder
coat finish. When supported every five feet, it has a maximum load capacity
of 132 pounds per foot with minimal deflection. Most components are packaged
and sold individually unless identified as a kit.
Build the Pathway Your Room Needs
Start with the ladder, shape the route with elbows and splice kits, support it with the right brackets, and finish it with cable drops and end caps.
A small room may only need one ladder section and a few supports. A larger installation can use the same product family to cross aisles, change elevation, and serve several rows of equipment.
The pieces work together, and the pathway can grow as your cable needs change.